How to Do Voice Memo on iPhone (2026 Guide)
Record on iPhone. AirDrop to Mac. Transcribe locally with Whisper.

Where is the voice memo app on iPhone?
Voice Memos is a built-in iPhone app — Apple ships it with every iPhone running current iOS, and you can't delete it. The icon is red with white soundwaves. If you don't see it on your Home Screen, swipe down from the middle of the Home Screen and type "voice memos" into Spotlight Search — it always appears as the top hit. If you've used App Library organization, look in the Utilities or Productivity folders. The app has been a stock iPhone feature for over a decade; on iOS 14 and later it's guaranteed to be there.How do you record a voice memo on iPhone?
Open Voice Memos, tap the red circle at the bottom to start, tap it again to stop. That's the entire record flow. A few useful extras: tap the waveform icon mid-recording to pause and resume. Rename the file by tapping its current title — defaults to "New Recording" plus the date in your locale. Pinch-to-zoom on the waveform during playback to scrub through a long memo fast. Trim with the edit (scissors) icon in the top right — "keep selection" replaces the original, but the trimmed-away audio is recoverable from the Recently Deleted folder for 30 days. For higher quality, tap the audio quality indicator in the recording view and switch to Lossless (48 kHz mono, larger file size) instead of the default Compressed (AAC, smaller file size). Most voice memo use cases don't need lossless, but if you're dictating something you'll transcribe later and care about word-level precision on quiet consonants, it can help.Why iCloud sync can break a "private" workflow
Here's the part most guides skip. By default, Voice Memos uses iCloud to keep recordings in sync across your iPhone, iPad, Mac, and Apple Watch. That sync is encrypted in transit and at rest, but it does mean a copy of your audio leaves your iPhone and lives on Apple's servers. For a journal or interview that's fine. For a lawyer dictating a client conversation, a doctor capturing a patient note, or anyone treating recordings as confidential, that sync is a real exposure. You can turn it off. On iPhone: Settings > [your name] > iCloud > Show All > Voice Memos > toggle off "Sync this iPhone." Existing recordings already synced will stay in iCloud unless you also delete them there. Disabling sync stops new recordings from uploading. From that moment on, your iPhone voice memos are local-only files in the app, and AirDrop becomes the cleanest way to move them to your Mac without any server touchpoint. The trade-off is that recordings no longer appear automatically on your other devices — by design.Pro tip: if you want both privacy AND access on multiple devices, record with sync off, AirDrop to a specific Mac, and back that Mac up with FileVault plus an encrypted external drive. iCloud never sees the file.
How to AirDrop voice memos from iPhone to Mac
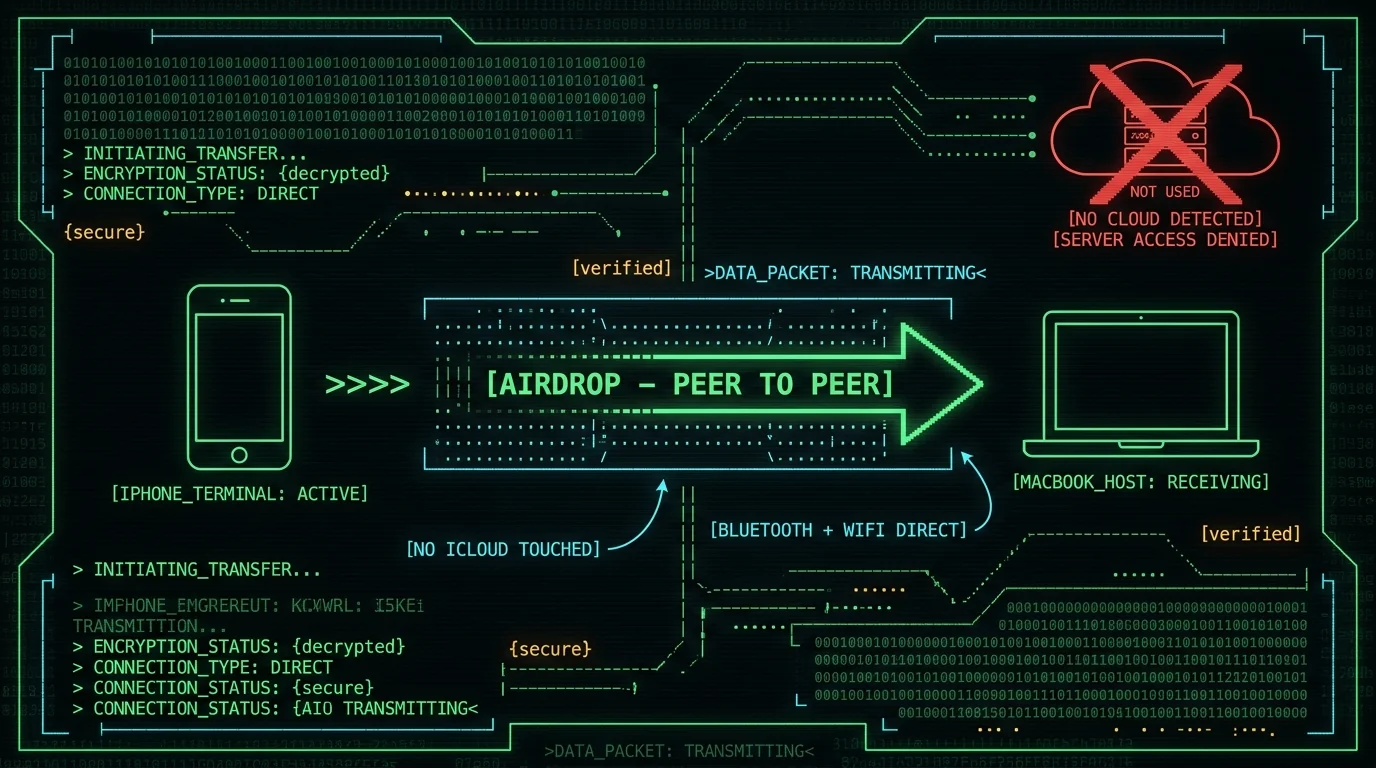
AirDrop is peer-to-peer — your iPhone creates an ad-hoc Wi-Fi or Bluetooth link to your Mac and pushes the file directly. Nothing routes through Apple's iCloud servers in the transfer itself. On iPhone, open the Voice Memos list, tap the three-dot menu on the recording (or tap to open it, then the share icon), pick the recording, and choose your Mac from the AirDrop sheet. On the Mac, accept the file — it lands in your Downloads folder by default. A few real quirks worth knowing. AirDrop needs both Bluetooth and Wi-Fi on, even though it doesn't use your normal Wi-Fi network. If your Mac doesn't show up in the AirDrop sheet, check that AirDrop is set to "Contacts Only" or "Everyone" on the Mac (Finder > AirDrop > drag the visibility setting). Large lossless recordings over an hour can take a couple of minutes — normal. The transferred file is .m4a with the AAC codec by default, or a higher-bitrate .m4a if you recorded in lossless. For background on how AirDrop's transport works, see Apple's iPhone User Guide.How to transcribe voice memos on Mac with MetaWhisp locally
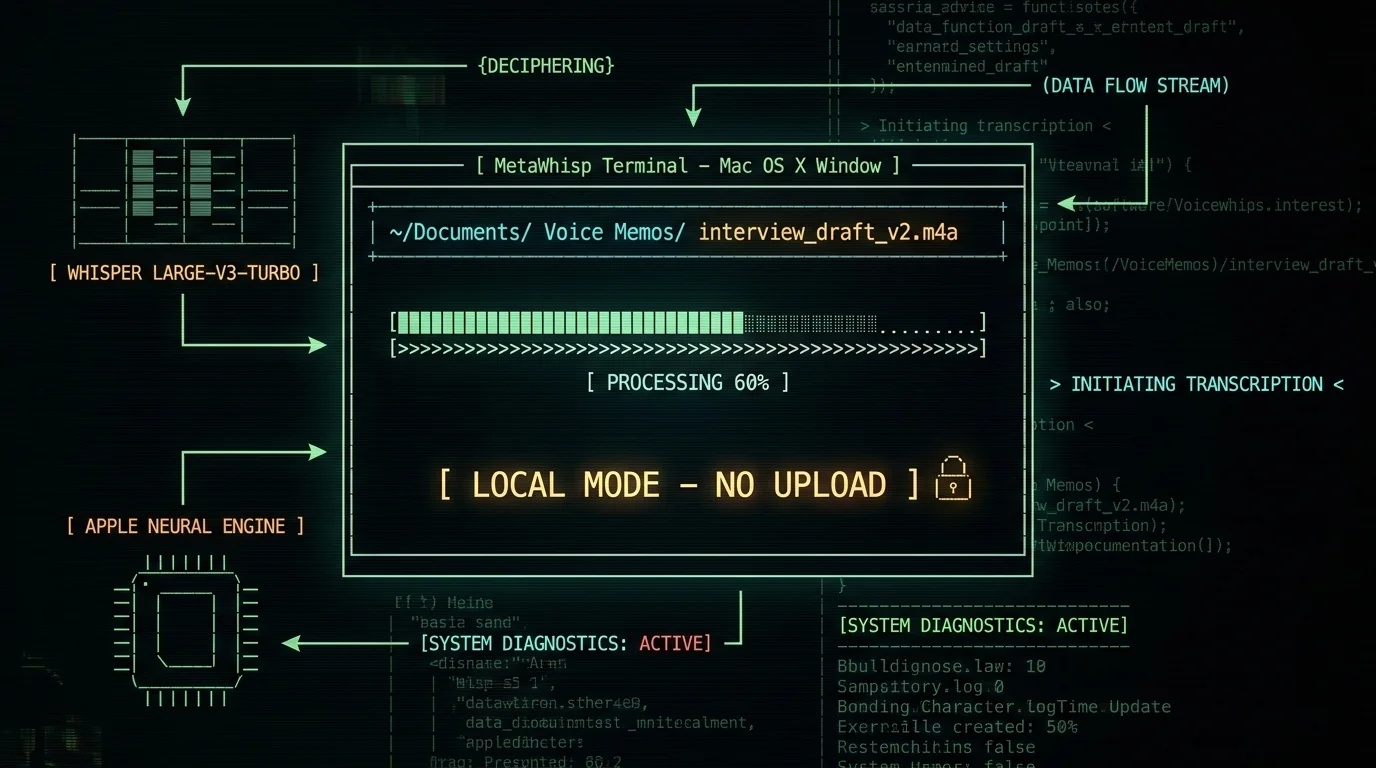
Once the .m4a file is on your Mac, you can drop it into MetaWhisp and have a transcript in minutes without sending audio anywhere. MetaWhisp runs Whisper large-v3-turbo through WhisperKit on the Apple Neural Engine — your audio is processed on-device. Here's the workflow I use daily:- Open MetaWhisp and pick a Processing Mode. For a raw transcript, "Quick" or "Standard" is the right choice (see processing modes for the full list).
- Drag the .m4a file from Downloads onto the MetaWhisp window.
- Wait. In our experience, a 10-minute memo takes roughly a third of its duration on an M1 Air, less on M2/M3 Pro chips.
- Copy the transcript, or have MetaWhisp auto-paste it into your notes app.
| MetaWhisp local (free) | MetaWhisp cloud (Pro) | |
|---|---|---|
| Cost | $0 | $7.77/mo or $30/yr |
| Audio uploaded to servers | No | Yes (cloud features only) |
| Languages | 99 with auto-detect | 99 with auto-detect + translation |
| Daily cap | None | Varies |
| Internet required | No | Yes for cloud features |
| Account required | No | Yes |
What format are voice memos, and can MetaWhisp read them?
Voice Memos records to .m4a (MPEG-4 Audio container) with AAC compression at the default quality setting, or higher-bitrate AAC at Lossless. Both are standard formats MetaWhisp ingests directly. The app also handles .mp3, .wav, .flac, .ogg, and a handful of others — anything WhisperKit decodes will work. If your file came from somewhere weird (a screen recording, a third-party recorder), check our guide on transcribing M4A files for the long version on format quirks and bitrate effects on accuracy.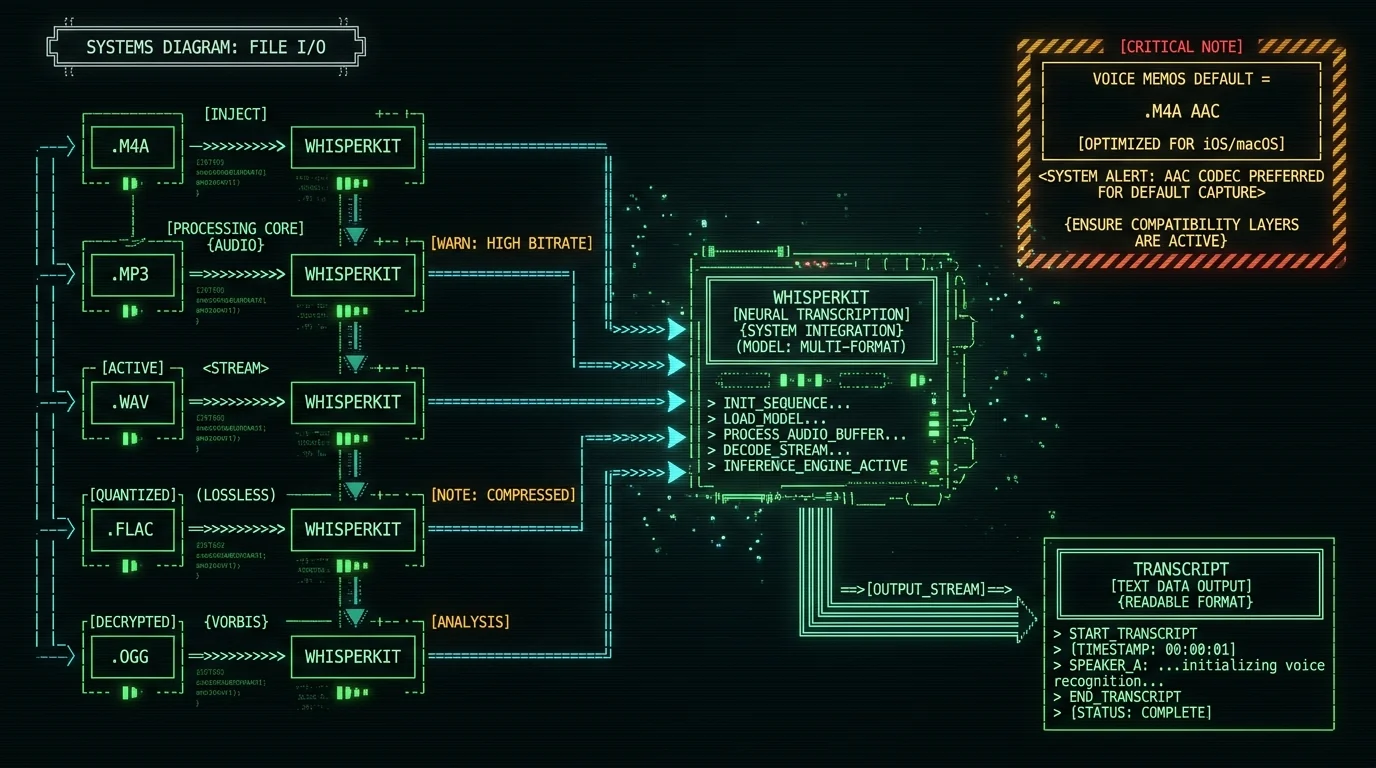
Can you skip the iPhone entirely?
Yes, and a lot of users do once they discover that MetaWhisp on Mac accepts any audio source. The Mac's built-in Voice Memos app, QuickTime Player, or any USB / Bluetooth microphone can record directly into a file MetaWhisp reads. The advantage of using iPhone first is portability — you can dictate on a walk, in a car, or away from a desk. The advantage of recording on the Mac is one fewer transfer step. If you want a single-tool setup, see our iPhone voice memo app roundup for the tradeoffs.Pro tip: for ADHD-friendly capture, keep the iPhone Voice Memos widget on your Lock Screen. Tap, talk, save. The memo's already on the Mac by the time I sit down.
What if I want to keep using iCloud sync?
Totally valid. iCloud sync is encrypted at rest and in transit, and for non-sensitive dictation it's the lowest-friction option. The argument for the local flow in this guide is specifically about audio that shouldn't leave your devices — confidential work, medical notes, legal dictation, source interviews that haven't been cleared for publication. Local mode in MetaWhisp may fit a HIPAA-style workflow because no audio is uploaded, but no tool on the market is "HIPAA compliant" as a product — that compliance belongs to the practice that adopts the tool, not the app vendor. For everyday journaling, leave iCloud on and don't overthink it.
Frequently asked questions
Where is the voice memo app on iPhone?
Voice Memos is preinstalled on every iPhone running iOS 14 or later and cannot be deleted. Swipe down on the Home Screen to open Spotlight, type "voice memos," and tap the result. The red-and-white icon launches straight into recording mode. It also lives in the App Library under Utilities or Productivity if you've organized apps into folders.
How long can you record a voice memo on iPhone?
There is no hard time limit — only available storage. A one-hour Compressed recording uses a small amount of space. A one-hour Lossless recording uses much more storage. Recordings auto-pause if your iPhone runs out of battery or storage. The Recently Deleted folder keeps deleted memos for 30 days before permanent erasure.
Do iPhone voice memos use iCloud?
By default, yes — if iCloud sync is enabled for Voice Memos in Settings > [your name] > iCloud > Voice Memos. The upload is encrypted at rest and in transit, but the file does leave your iPhone. To stop sync, toggle off "Sync this iPhone" in the same menu. Existing synced recordings remain in iCloud until you delete them there.
Can iPhone transcribe voice memos natively?
Not directly. Apple Dictation on iPhone works in text fields while typing, but it does not transcribe an existing Voice Memos file into a separate document. To get a transcript of a saved memo, you need a transcription app or service — MetaWhisp on Mac is one option; other cloud tools are alternatives. Apple has not shipped a Voice Memos transcription feature as of the latest iOS version.
How do I AirDrop a voice memo to my Mac?
In the Voice Memos list, tap the three-dot menu on the recording, or open the recording and tap the share icon. Choose AirDrop, then pick your Mac from the sheet. On the Mac, click Accept — the file lands in Downloads by default. Both Bluetooth and Wi-Fi must be on for AirDrop to find the Mac, even though AirDrop doesn't use your regular Wi-Fi network.
What format is an iPhone voice memo?
.m4a (MPEG-4 Audio container) with AAC compression. Default Compressed quality produces small files. Lossless is 48 kHz mono with substantially larger file sizes. MetaWhisp reads both directly, no conversion needed. The app also accepts .mp3, .wav, .flac, and .ogg.
Can I keep voice memos off the cloud entirely?
Yes. Disable iCloud sync for Voice Memos in Settings, then transfer recordings to a Mac using AirDrop. AirDrop is a peer-to-peer transfer — your iPhone and Mac talk directly over Wi-Fi/Bluetooth without sending data through Apple's servers. Once the .m4a is on the Mac, MetaWhisp's free local mode transcribes it on-device using Whisper on the Apple Neural Engine.
Is MetaWhisp free for transcribing voice memos?
Yes. The local transcription mode is free and unlimited — no account, no daily cap, no telemetry. The Whisper large-v3-turbo model (~950 MB) downloads once on first use and runs on-device via the Apple Neural Engine. Pro is $30/year or $7.77/month and adds cloud-based features including translation and AI text formatting; Pro features upload audio to servers, so use them only when that's appropriate. For local-only transcripts, free mode is the whole answer.
About the author: Andrew Dyuzhov is the CEO and solo founder of MetaWhisp. He's a marketer and builder with ADHD who uses voice-first workflows to push past writing paralysis and dictates daily in Russian and English. He built MetaWhisp on top of open-source Whisper with the help of AI coding tools, and is not an ML researcher or transcription scientist — just a heavy daily user who wants his audio to stay on his own machines.