What is BlackHole audio on Mac?
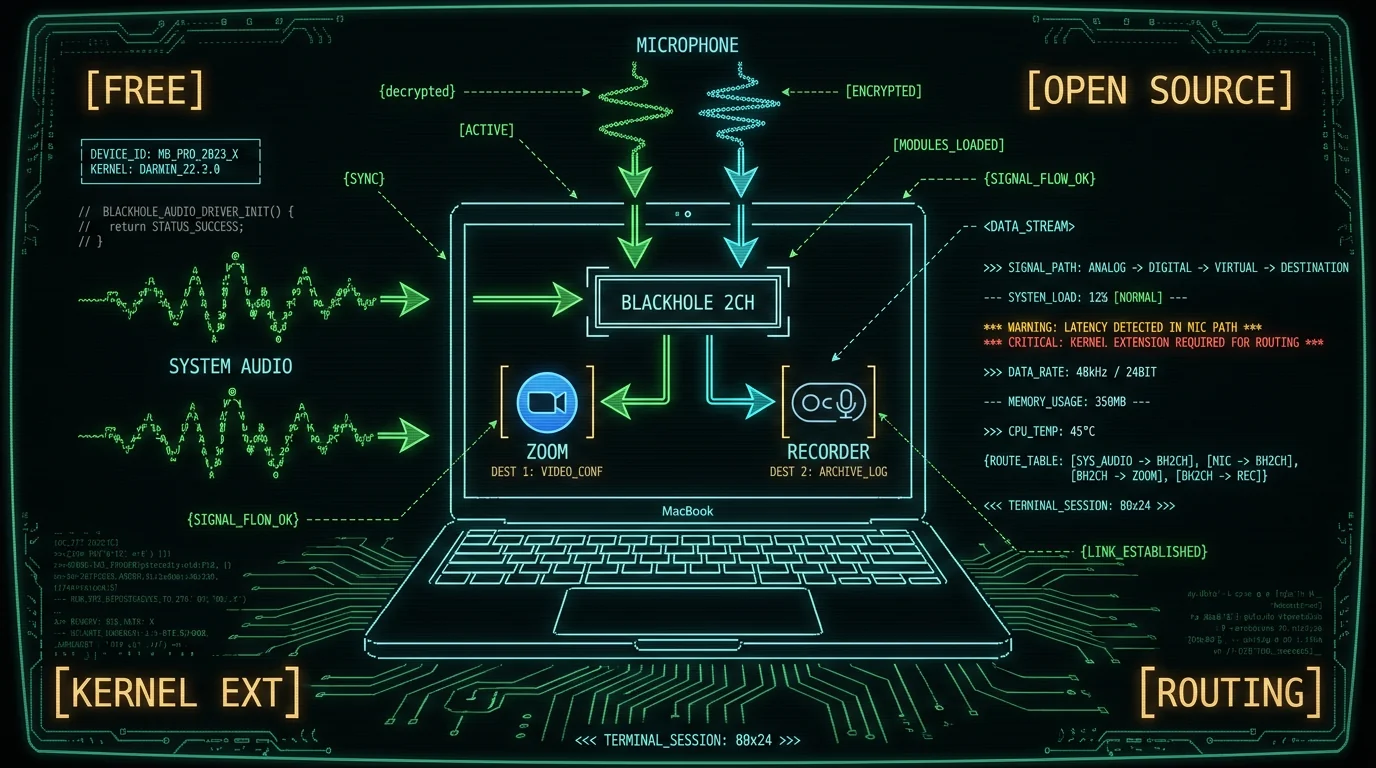
BlackHole is a free virtual audio driver for macOS, published by Existential Audio under an open-source license. It installs as a system audio device that you can't hear, but other apps can: any app that lists input or output devices in macOS will see BlackHole 2-channel or BlackHole 16-channel sitting alongside your MacBook speakers, AirPods, and USB interface. That's the whole trick. Normally, macOS won't let one app record what another app is playing. The audio is playing out, and the system treats "what your speakers receive" as the end of the line. BlackHole inserts itself into that pipeline as a fake destination — your call app outputs to BlackHole, BlackHole passes the audio along to your real speakers so you still hear everything, and BlackHole also exposes that same audio stream as an input that any other app can subscribe to. It's the cleanest free option for that job on macOS, which is why every "how do I record a Zoom call" thread eventually ends up here. You can grab the installer from the official Existential Audio site.Why macOS needs a virtual driver for system audio
macOS sandboxes audio by default. An app can play sound through the output device and an app can record from the input device, but apps cannot tap the audio stream of another app without an explicit mechanism. That mechanism used to be Soundflower (now mostly unmaintained) and Loopback (paid, excellent). BlackHole is the modern free successor. You bump into this wall the first time you try to record a Zoom meeting, capture Discord audio for a podcast, or save the audio from a YouTube tab. Your recorder has a microphone input, and that's it — there's no built-in "System Audio" option for third-party apps to subscribe to directly without routing workarounds. The most common sanctioned path is a virtual device that the recorder can subscribe to, and BlackHole is the most popular free choice. There's a side effect worth knowing about: when you set BlackHole as the output for your call app, you stop hearing the call unless you also create a Multi-Output device that mixes BlackHole with your real speakers. We'll get to that in a minute.How to install BlackHole on macOS
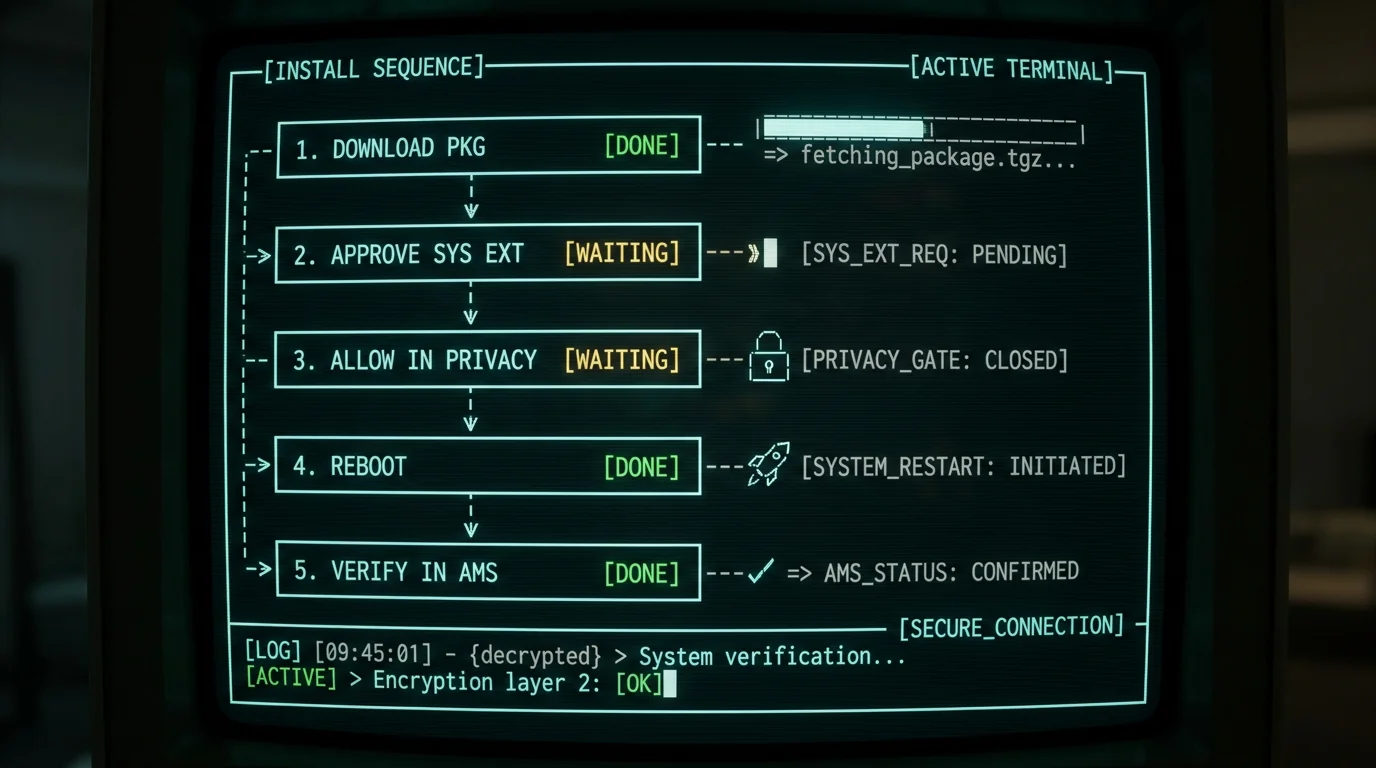
The install itself is short. The longer part is deciding which version and where to put it.- Go to existential.audio/blackhole and download the installer package. Pick BlackHole 2-channel unless you have a specific reason for 16-channel.
- Open the
.pkgfile. macOS will ask for your admin password and then prompt you to allow a system extension from Existential Audio. - Open System Settings → Privacy & Security, scroll to the bottom, and click Allow next to the message about the blocked system extension. You'll need to authenticate again.
- Restart. Yes, really. The system extension loads at boot.
- After the reboot, open Audio MIDI Setup (search for it in Spotlight, or find it in
/Applications/Utilities/). You should see BlackHole 2ch in the device list on the left.
Pro tip: Before you install, run uname -m in Terminal. If your Mac is Apple Silicon (M1 or later), make sure you grabbed the recent Universal installer. The old Intel-only builds still install on M-series Macs in compatibility mode but can occasionally misbehave under hot-swapping output devices.
How to build an Aggregate or Multi-Output device
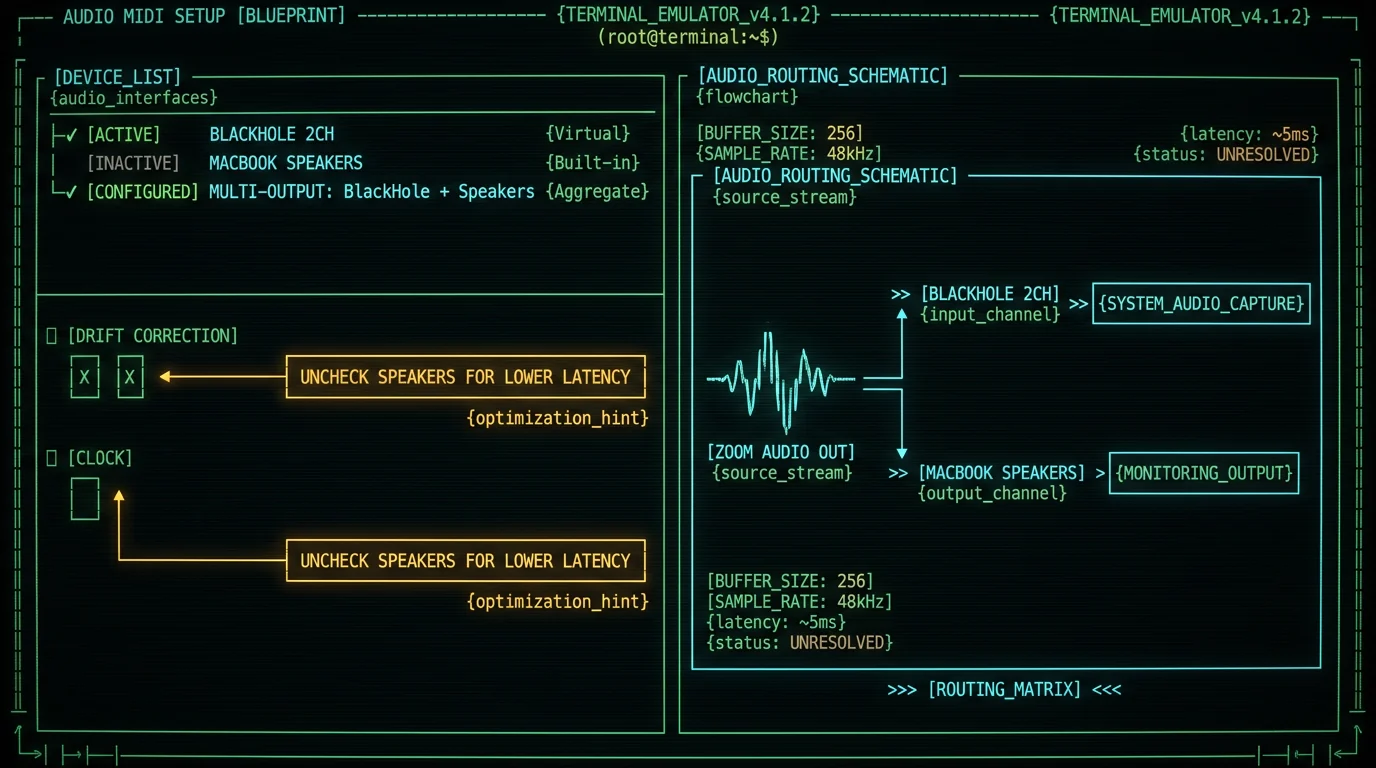
This is the part most guides bury under screenshots. The reason you need an Aggregate device: as soon as you set BlackHole as the output for Zoom, your speakers go silent. To hear the call and have it captured, you create a Multi-Output device that fans audio out to BlackHole and your real speakers at the same time.- Open Audio MIDI Setup (already open from the install, hopefully).
- Click the + button at the bottom of the device list and choose Create Multi-Output Device. (For recording both your mic and the other side as separate inputs, choose Create Aggregate Device instead — same idea, different direction.)
- In the new device panel, check the boxes next to BlackHole 2ch and your real output (MacBook Speakers, AirPods, whatever you usually use).
- Optionally, click the small clock icon next to BlackHole to set drift correction, and uncheck it next to your speakers to avoid lag.
- Right-click your new Multi-Output Device, rename it to something obvious like "BlackHole + Speakers."
- Right-click your real speakers in the device list and pick Use This Device For → Sound Output only after testing — otherwise macOS may keep flipping the system default back.
Routing Zoom, Meet, Discord, and OBS through BlackHole
The setup differs a little per app, but the pattern is identical: route the call's audio out through the BlackHole-backed Multi-Output, and route the recorder's input from BlackHole.| App | Where to set the output | Where to point the recorder |
|---|---|---|
| Zoom | Settings → Audio → Speaker → "BlackHole + Speakers" | Recorder input → BlackHole 2ch |
| Google Meet | Meet settings → Audio → Speakers → Multi-Output device | Recorder input → BlackHole 2ch |
| Discord | Settings → Voice & Video → Output Device → Multi-Output device | Recorder input → BlackHole 2ch |
| Microsoft Teams | Settings → Devices → Speaker → Multi-Output device | Recorder input → BlackHole 2ch |
| OBS Studio | Audio → Advanced → Monitoring Device can route app audio | OBS Audio Capture source → BlackHole 2ch |
When you can skip BlackHole entirely
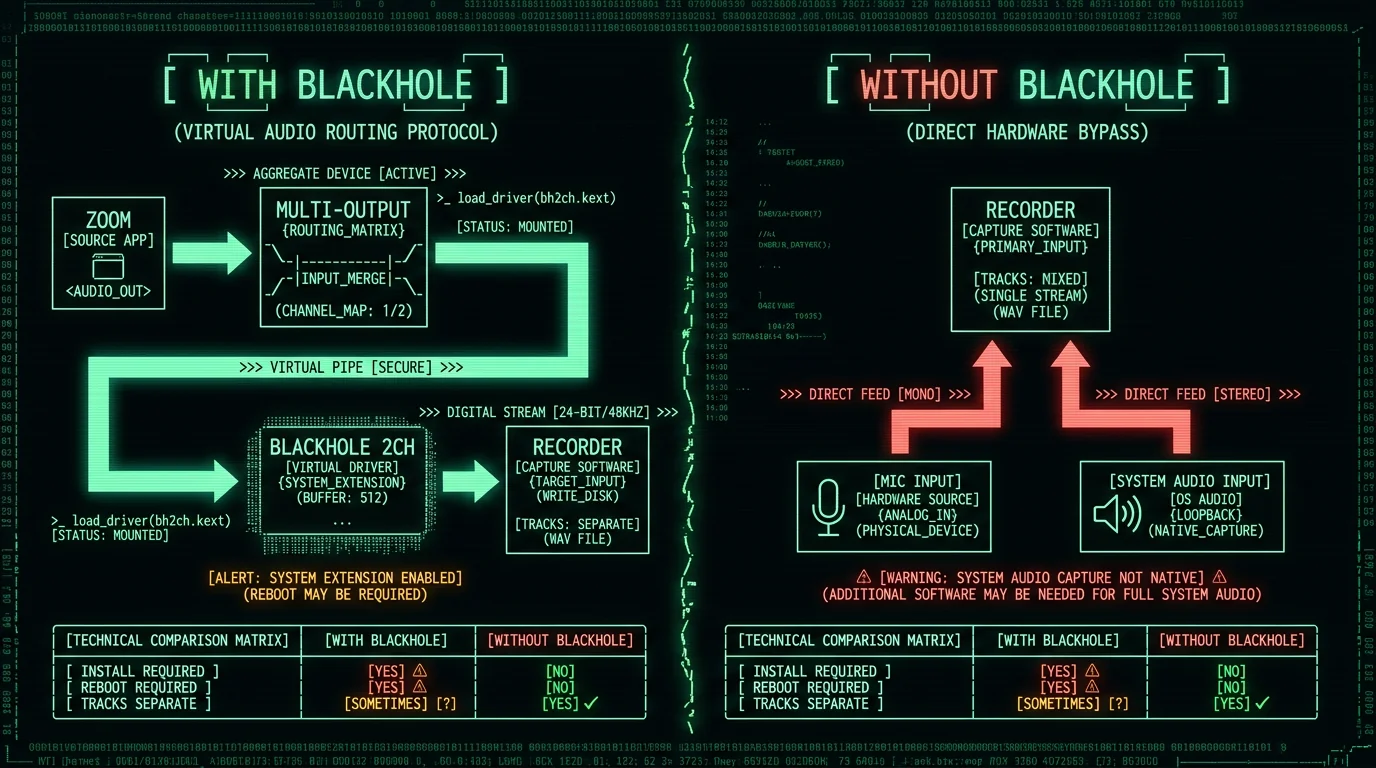
BlackHole is not the only way to capture call audio on a Mac. It's the most general — it works for any audio app — but it has real costs: a system extension, a reboot, a Multi-Output device, and the moment where your speakers go silent if you forget to build the device correctly. If your goal is specifically to record and transcribe a call, several tools record system audio natively:- Zoom has built-in cloud recording with a separate audio track per speaker. No driver, no routing.
- Riverside.fm, SquadCast, Zencastr record each participant locally in the browser.
- QuickTime Player can do screen-and-audio captures in newer macOS versions for some apps.
- macOS screen recorders with system-audio capture (the system audio option added to the Screen Recording toolbar in recent macOS releases) capture system output natively for many apps.
Recording and transcribing both sides without a virtual driver
The track-separation question is the reason most people end up on this article in the first place. They want a transcript that says who said what — or at least a transcript where their own voice and the other participants aren't mashed into one stream. BlackHole gives you this if you build an Aggregate device with your microphone on channel 1 and BlackHole on channel 2, then point a recorder at it. From there you can run the audio through OpenAI's Whisper (or a third-party Whisper implementation such as WhisperKit) and get a transcript per channel. But "per channel" is important to name correctly. It's track separation — your microphone versus system audio — not voice-print diarization, which would mean identifying specific people by their vocal fingerprint. If three people are on the other end of the call, you'll get one transcript for "the other side," not three transcripts for Alice, Bob, and Carol. For most meeting notes and search archives, that's enough. For courtroom-style "who exactly said this," you need a tool with explicit diarization, and that's still a gap in our own stack — MetaWhisp does not ship voice-print diarization today. The MetaWhisp side of this lives in our processing modes and pricing pages, but the short version is: on the free tier, with the local on-device model, you can pick two inputs, capture both as separate tracks, and dictate into whichever app is in focus. Pro lifts the bring-your-own-key requirement if you want cloud polish on top. For more on the specific Zoom workflow — the most common reason people want this — read our piece on local Zoom transcription and the limits of speaker diarization. It explains where the line sits between what track separation gives you and what true diarization would require.Pro tip: If you do go the BlackHole route for a high-stakes recording — a deposition, an interview, a podcast you can't re-shoot — record both the Aggregate-device input and the system output to a stereo file. The system output is your safety copy. If your recorder drops a track or your Aggregate device misbehaves mid-call, the system audio still has everything.
Troubleshooting when BlackHole doesn't show up
Most "BlackHole isn't working" complaints come down to one of four causes. Walk through them in order.- The system extension wasn't approved. Open System Settings → Privacy & Security and scroll to the bottom. The "Allow" button for the Existential Audio extension is only visible for 30 minutes after install. If you missed the window, uninstall and reinstall to get the prompt again.
- You forgot to restart. The driver is a kernel-level component. It is not visible to Audio MIDI Setup or to any app until the next boot.
- macOS is using a different security profile. On managed Macs (corporate, MDM, school), the Allow button may be grayed out entirely. You'll need your IT admin to push a system-extension policy or to use Apple's
Endpoint Securitytooling. - You installed an old version on a new macOS. Major macOS releases occasionally invalidate old audio drivers. Check the release notes on existential.audio/blackhole and grab the latest build. The Core Audio framework changes underneath, and Existential Audio usually ships a compatibility update within a few weeks of a major macOS release.
BlackHole.driver bundle from /Library/Audio/Plug-Ins/HAL, restart, and the devices disappear from Audio MIDI Setup. If you've created an Aggregate or Multi-Output device, it will stick around as an empty entry until you delete it manually — right-click in Audio MIDI Setup and choose Remove Device.
Frequently asked questions
Is BlackHole safe to install on Mac?
Yes. BlackHole is open-source on GitHub, distributed by a known developer (Existential Audio), and used by podcasters and streamers. It installs a HAL audio driver and a system extension. Like any audio driver, you should download it from the official site only and not from a mirror, the same way you'd handle any kernel-level installer. If you're on a managed Mac at work, ask IT before installing.
Does BlackHole work on Apple Silicon?
Yes. Existential Audio publishes Universal builds that run natively on M1, M2, M3, and later chips. The project historically also shipped Intel-only builds; if you grab an older download by accident, it'll run through Rosetta on an M-series Mac, which works but isn't ideal. Always download the current build from the official site.
Do I need BlackHole to record a Zoom call?
No. Zoom has built-in cloud recording with separate audio tracks for each participant. You only need BlackHole if you want to capture audio from an app that doesn't have its own recording feature, or if you want to grab the audio in raw form before Zoom processes it. If your goal is a transcript rather than a podcast-quality recording, a call-aware recorder that captures mic and system audio as separate inputs is usually simpler.
What's the difference between BlackHole 2-channel and 16-channel?
Channel count means how many independent audio streams the virtual device can carry at once. 2-channel is enough for any voice call or stereo music. 16-channel is for routing multitrack sessions between DAWs and audio production tools. For recording a Zoom meeting or a podcast interview, 2-channel is what you want.
Why does my app not see BlackHole as an input?
Three usual causes: you skipped the restart, you didn't approve the system extension in Privacy & Security, or you're running an app that hasn't been refreshed since BlackHole installed — quit and reopen the app. If the app is sandboxed tightly (some screen recorders, some browser-based capture tools), it may not see non-Apple audio devices at all; that's an app limitation, not a BlackHole bug.
Does BlackHole add latency?
Adding any audio driver adds some buffer time, but in normal use the added latency is small enough that you won't hear it on a voice call. The more common source of noticeable lag is drift correction on the Multi-Output device — uncheck drift correction on your real speakers and keep it on BlackHole for the cleanest path. If you're recording music or doing a live podcast and you're sensitive to milliseconds, switch to a paid tool like Rogue Amoeba's Loopback.
Is there a free alternative to BlackHole?
For routing alone, BlackHole is essentially the only actively maintained free option on macOS. Soundflower, the older free driver, is unmaintained and breaks on recent macOS releases. Loopback by Rogue Amoeba is the paid alternative and is genuinely better for production work. For call recording specifically, modern macOS screen recorders and call-aware tools capture system audio without a virtual driver at all.
How does MetaWhisp record both sides of a call without a virtual driver?
MetaWhisp is a voice-to-text app first, and on the free tier it runs an on-device Whisper model on the Mac's Neural Engine. When you configure a session you can pick two inputs: your microphone and a system-audio source. Each becomes its own track, so the transcript comes out as "your voice" and "the other side" — track separation, not voice-print diarization. No driver install, no Multi-Output device, no Audio MIDI Setup. The catch is that the goal is text, not a podcast-quality audio file. If you want the raw audio for editing, BlackHole is still the right tool.
About the author
Andrew Dyuzhov is the solo founder of MetaWhisp, a free on-device voice-to-text app for macOS. He builds with AI coding tools, dictates daily in Russian and English, and wrote this guide after losing an afternoon to a misconfigured Aggregate device. Follow the build log on X.
