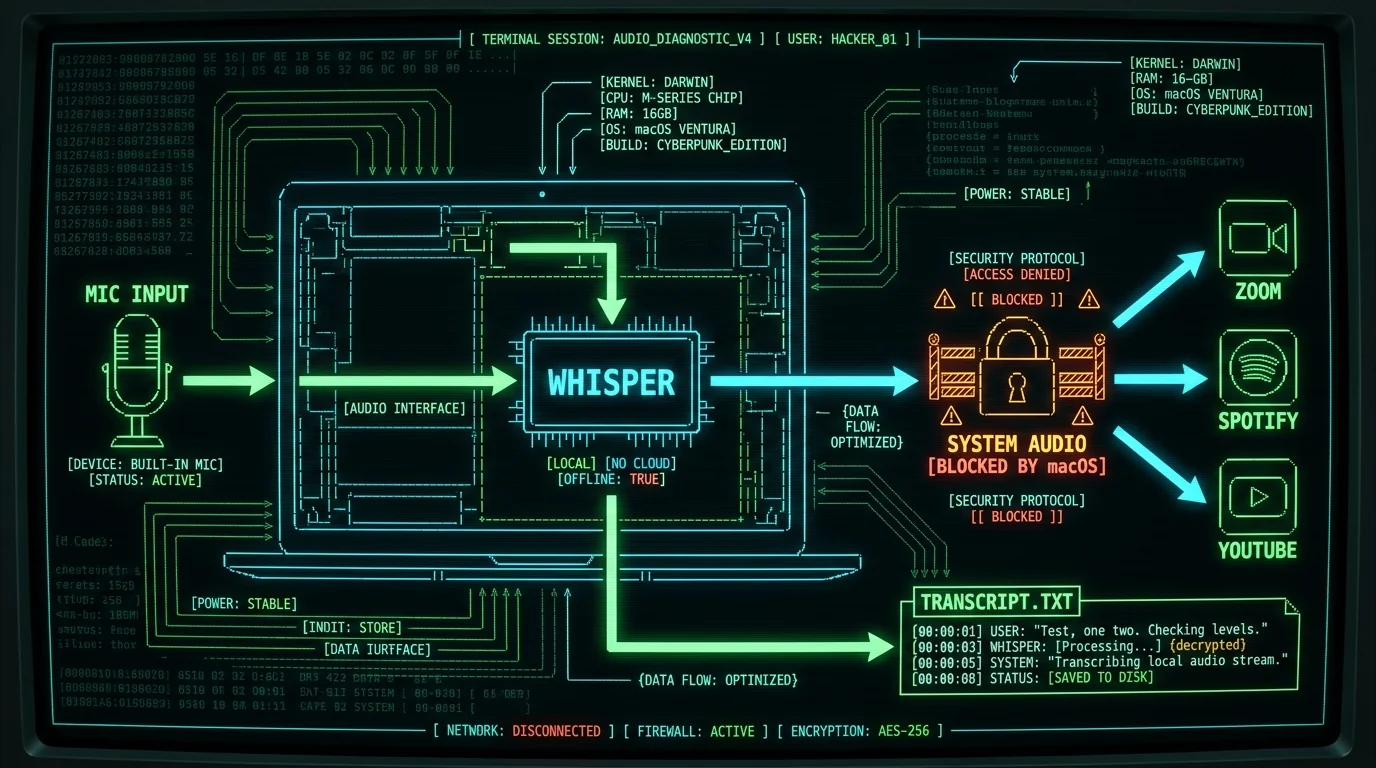
Why doesn't QuickTime record internal audio on Mac?
QuickTime Player, the app that ships with every Mac, has a New Audio Recording command in its File menu. It captures your microphone. Only your microphone. That is not a missing feature — it is the design.
Apple's Core Audio architecture exposes microphone hardware as an input source to apps, but it does not expose "the audio currently playing on this Mac" as an input source. So when you launch QuickTime, choose File → New Audio Recording, pick your USB mic or built-in mic, and click Record, you get a clean track of your own voice. If a Zoom call is playing through your speakers at the same time, your recording will not include it. Your mic will pick up whatever bleeds into the room, but that is acoustic bleed, not system audio.
QuickTime's New Screen Recording is a different story. That command does capture system audio, because screen recording uses Apple's video pipeline which has access to audio streams. The catch: the output is a video file, not an audio file. You can extract the audio later, but it is two extra steps and an extra codec to wrangle.
Can QuickTime capture internal audio on Mac?
For audio-only output, no. QuickTime Player's audio recording mode captures microphone input exclusively, by design. Apple's Core Audio framework routes microphone hardware to recording apps as an input source, but it does not route "the audio playing on this Mac" as an input. For system audio, your options are an aggregate device (built into macOS), a third-party virtual audio driver like BlackHole, or a recording app that uses ScreenCaptureKit. Screen recording in QuickTime does grab system audio but saves a video file, which is rarely what you actually want.
What macOS actually routes (and what it hides)
Open Audio MIDI Setup — it lives in Applications/Utilities — and you will see a list of your hardware: built-in speakers, your USB mic, maybe a Thunderbolt audio interface. These are your physical endpoints. They are the only things apps can directly send audio to or receive audio from.
What you will not see, by default, is anything representing "the audio currently playing." That stream exists, technically — every sound goes through Apple's Core Audio HAL (hardware abstraction layer) before reaching your speakers. But the HAL exposes it as an output, not as something another app can subscribe to as an input. There is no menu toggle, no System Settings switch, no "expose system audio as an input" checkbox.
The reason for this is mostly about preventing apps from snooping on each other's audio without permission. macOS does eventually let authorized apps capture audio — but only through specific, narrowly-scoped frameworks. Core Audio, ScreenCaptureKit, and a handful of AVFoundation APIs are the gates. Outside of those, you need to either route audio yourself (with a virtual cable) or use an app that already has the right entitlements.
What is a loopback device, really?
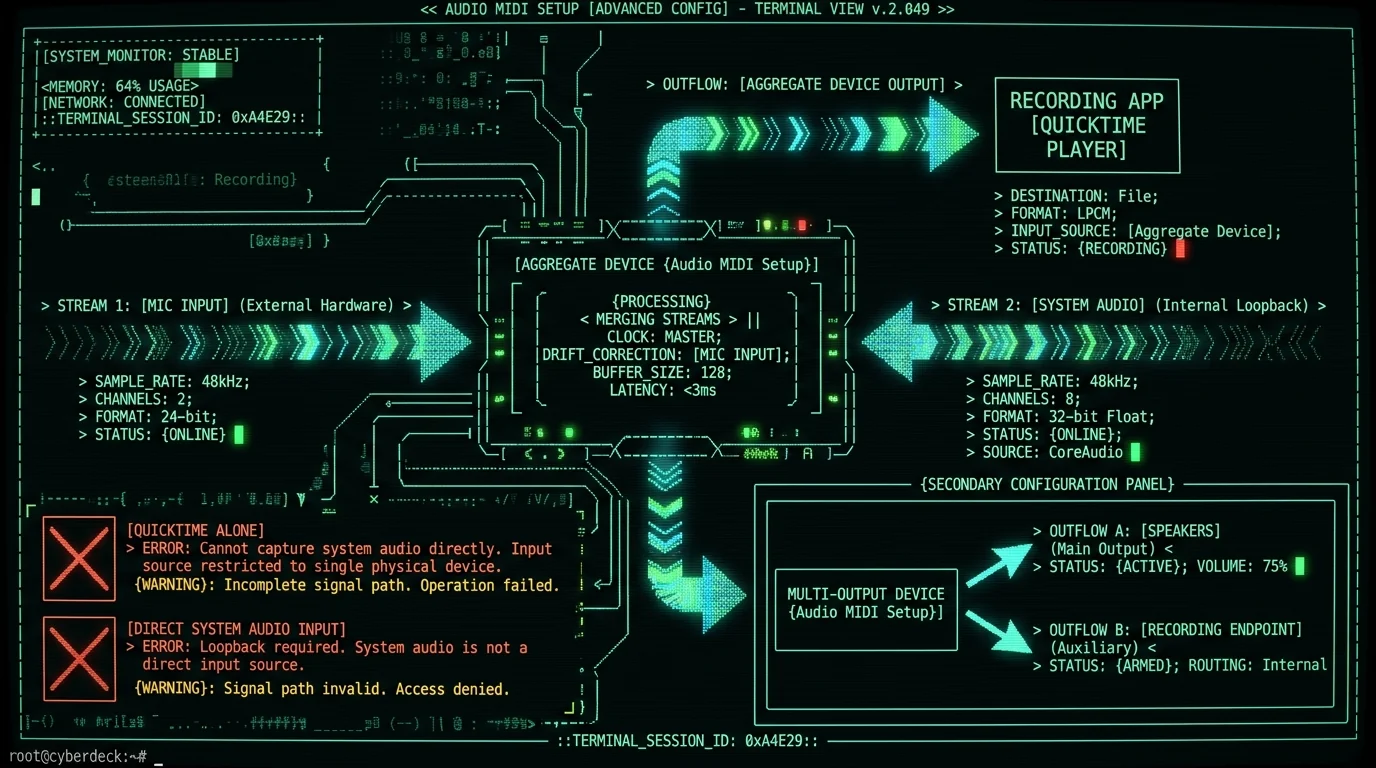
A loopback device is a fake audio interface that macOS thinks is real. It has an input and an output. The trick: whatever audio goes into its output gets routed back to its input. So you set your Mac to play through the loopback device's output (instead of your speakers), and your recording app captures from the loopback device's input. The audio makes a round trip.
The most common way to do this is with a virtual audio driver. BlackHole is the open-source option — free, well-maintained, and quietly excellent. Install it once, restart your audio routing preferences, and BlackHole appears as a 2-channel or 16-channel audio device. You point apps at it for output, and they appear as inputs.
macOS also has a built-in concept called an Aggregate Device. You create one in Audio MIDI Setup by checking multiple physical devices into a single virtual device. This is not exactly loopback — it does not by itself route audio back to itself — but you can pair an aggregate with a Multi-Output Device so the same audio plays to your speakers and to a recorder. That is the classic DIY setup people used before BlackHole became standard.
What's the difference between BlackHole and an aggregate device?
An aggregate device combines multiple physical audio interfaces into one virtual device — useful when you have two USB mics and want them to show up as one input, for instance. BlackHole is a loopback driver: it has no physical hardware behind it, but it lets you route audio from one app's output into another app's input. To actually capture system audio, you typically use both: a Multi-Output Device plays audio to your speakers and to BlackHole's input, then BlackHole's output appears as a capture source in your recorder. BlackHole is the cleaner modern path; aggregate devices are the older, more fiddly way to do the same thing.
Why does mixed loopback break down on calls?
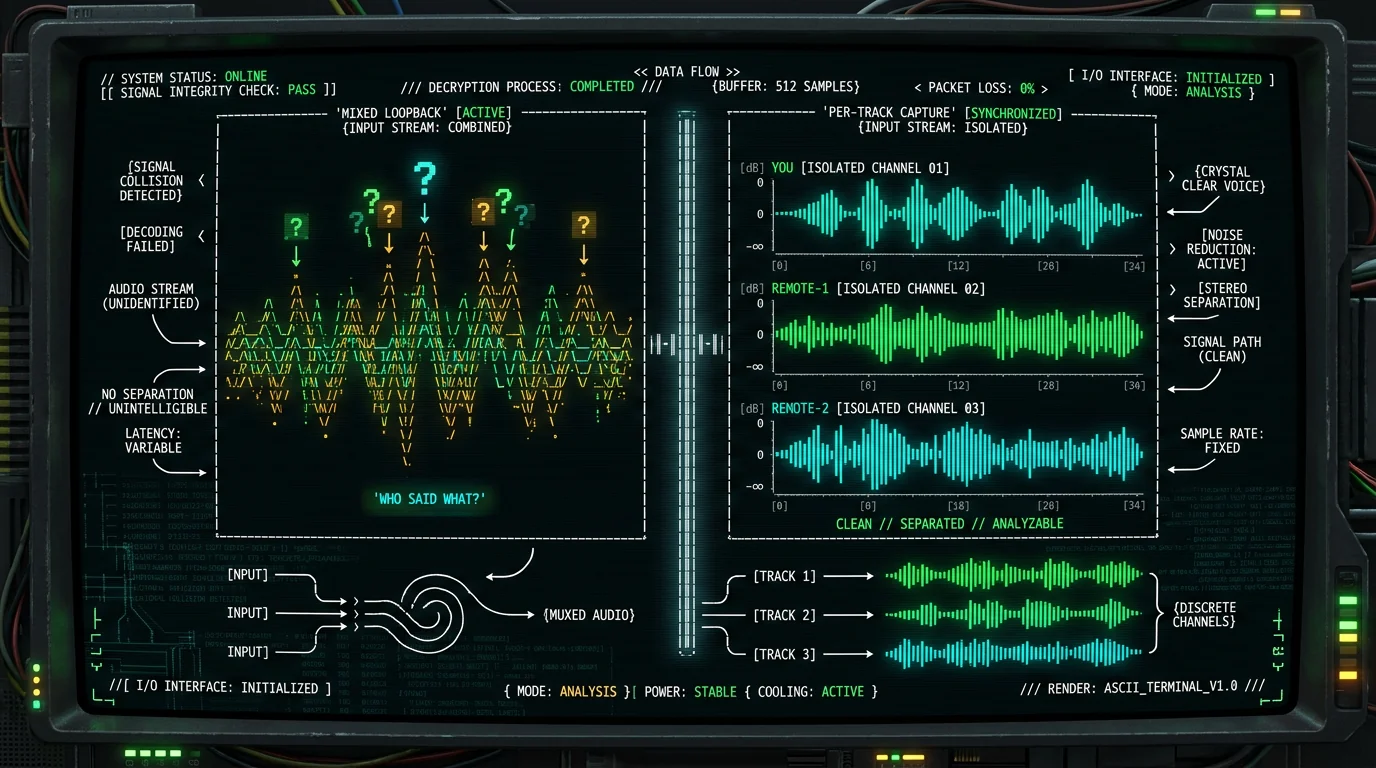
Here is the actual problem loopback cannot solve: when you capture system audio during a Zoom, Meet, or Teams call, you are capturing the mix. Your voice (routed through the meeting app's echo cancellation) plus every other participant's voice, all collapsed into one stereo stream. That stream transcribes — Whisper handles mixed speech well enough — but you lose track of who said what.
For a one-off interview, a single mixed track might be fine. For a meeting you need to act on, or a customer call you need to summarize, mixed audio is a nightmare. Two people say "yes" at the same time. Someone cracks a joke while another is mid-sentence. The transcript has rows of unattributed quotes.
This is also why voice-to-text apps that only transcribe the system track leave you doing the "wait, who was that?" work yourself. The fix is per-track capture: separate your microphone input from the system audio before the recording starts, so your mic gets transcribed as one stream and the meeting audio gets transcribed as another. You still have to label speakers if you want names attached, but at least the streams are clean.
How ScreenCaptureKit changed Mac audio capture
Before macOS 13, capturing app audio required either a virtual audio driver or a recording app with special entitlements. Apple introduced ScreenCaptureKit — originally for screen recording — and steadily expanded it to cover audio. The framework exposes audio streams from individual apps, with the user's explicit consent.
For you, this means a class of newer apps can capture audio from a single app (say, Spotify) without affecting your microphone or system audio. Several paid utilities take advantage of these newer frameworks. And so does MetaWhisp, for a specific reason I will get to.
The privacy model is important. ScreenCaptureKit requires the user to grant Screen Recording and Microphone permission through System Settings → Privacy & Security. macOS shows a clear prompt the first time the app tries to capture. There is no silent background capture — Apple's whole point with this stack is that audio capture must be visible to the user.
Does ScreenCaptureKit require user permission?
Yes. The first time an app tries to capture screen or app audio via ScreenCaptureKit, macOS prompts for Screen Recording permission in System Settings → Privacy & Security. You have to unlock the pane, toggle the app on, and restart it. There is no API for silent background audio capture — Apple deliberately made the consent flow visible. If you have ever denied a screen recording permission and then wondered why a recording app stopped working, this is why. Microphone permission is a separate toggle, and both are required to capture both your voice and system audio.
What is per-track capture for meetings?
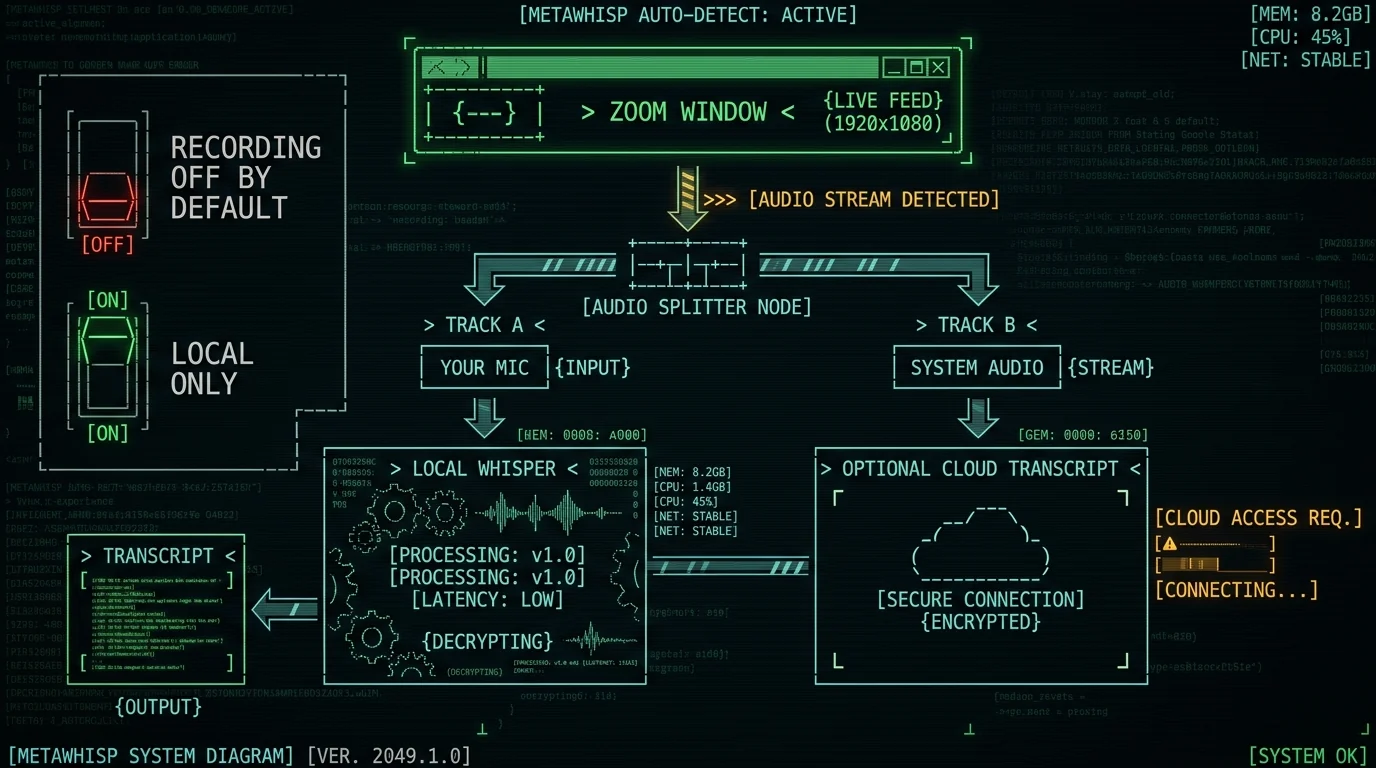
Per-track capture is the approach MetaWhisp takes for meeting audio. The idea is simple: instead of mixing your voice and the meeting audio into one stream, capture them as two separate audio tracks from the moment recording starts.
In practice, this works like this. When MetaWhisp detects a meeting window — Zoom, Google Meet, Microsoft Teams, FaceTime, Webex, Slack huddles, Discord — it opens two parallel capture streams. One reads from your microphone input. The other reads the system audio associated with the meeting app, using the entitlements and frameworks macOS provides for that. Both streams get timestamps; both are saved as separate files alongside your local transcript.
The local Whisper model handles your microphone track — that is the same path as normal voice-to-text dictation, free and offline, no account, no upload. The system audio track is opt-in: you turn it on explicitly in settings, and recording is OFF by default. When it is on, you can choose to keep system audio on-device too (the local Whisper model can transcribe both tracks) or send it to a transcription service you control via your own API key.
This split solves the "who said what" problem at the source rather than after the fact. Your mic track is your voice, attributed to you by default. The system audio track is everyone else — mixed, yes, but cleanly separated from your contribution, so you can read the transcript without your own lines muddying the output.
How to capture call audio with MetaWhisp
If you only need to capture your own voice during a meeting — for taking notes, for AI-cleaned summaries, for handing off the transcript to a colleague — you do not need anything special. MetaWhisp's global hotkey (default Right Option ⌥) works the same in a meeting as anywhere else. Hold the hotkey, talk, release, and the dictated text pastes wherever your cursor is. Your voice is transcribed locally, the audio never leaves your Mac.
If you want both sides captured as separate tracks, the steps are:
- Install MetaWhisp on macOS 14 or 15, Apple Silicon. Free, no account.
- Open the app once and grant the system permissions it requests: Microphone, and Screen Recording (the latter is what unlocks per-app audio capture).
- Open Settings → Call Capture and toggle on Record meeting audio. This is OFF by default — you have to opt in.
- Start your Zoom, Meet, Teams, FaceTime, Webex, Slack huddle, or Discord call. MetaWhisp detects the active meeting window automatically.
- Use the global hotkey as usual to dictate. Your mic track is captured and transcribed locally on every press.
- When the call ends, the system audio track is saved alongside your transcript in the local library. You can transcribe it locally too, or skip it if you only wanted your own side.
Local capture is free and unlimited. If you want AI post-processing — structured summaries, corrected transcripts, rewrites — you can plug in your own OpenAI or Cerebras API key in Processing Modes. Only the transcript text (never the audio) goes to your API endpoint, not to MetaWhisp's servers. If you would rather not manage a key, MetaWhisp Pro covers it with built-in cloud AI and adds cloud transcription for long meetings; see the pricing page for the current breakdown.
Pro tip: If you want clean transcripts from calls, get the system audio out of the room before you start. Use headphones, not speakers. Speakers bleed the meeting back into your microphone, and MetaWhisp captures your mic track only — so any speaker audio that bleeds into your mic will be transcribed as your words. Headphones make per-track capture work the way it should.
Which method should you pick?
| Method | Captures system audio | Per-track separation | Setup complexity | Free |
|---|---|---|---|---|
| QuickTime (audio-only mode) | No — mic only | — | Trivial | Yes |
| QuickTime (screen recording) | Yes, but as a video file | No | Easy | Yes |
| Aggregate Device + Multi-Output | Yes | No (mixed stream) | Moderate | Yes |
| BlackHole loopback | Yes | No (mixed stream) | Moderate | Yes |
| ScreenCaptureKit-based paid apps (Loopback, etc.) | Yes | Some offer per-app capture | Easy | No |
| MetaWhisp (local model) | Yes, when toggled on | Yes — mic and system as separate tracks | Easy | Yes (local) |
If your goal is a one-off system audio recording with no transcription needs — say, capturing a stream of audio for editing — BlackHole plus Audacity or QuickTime is the most flexible free path. If your goal is transcription of your own voice for dictation, MetaWhisp alone does that on-device without any of this routing. If your goal is a meeting transcript with both sides captured cleanly, per-track capture wins. For deeper coverage of meeting transcription specifically, see how to record and transcribe any call on Mac and the Zoom transcription walkthrough.
Is it legal to record a call without telling people?
It depends on where you and the other participants are. Some jurisdictions require one-party consent (you can record as long as one person in the conversation knows — that can be you). Others require all-party consent. The law shifts state by state in the US and country by country elsewhere. The honest answer is not "yes" or "no" — it is "check your local law, then tell people anyway." Practically: even where one-party consent is enough, telling the room is the relationship-preserving move. If you are using per-track capture for accurate meeting notes, you will get cleaner transcripts if no one is anxious about being recorded.
Frequently asked questions
Can I record internal audio on Mac without installing anything?
For audio-only output, no. QuickTime Player's New Audio Recording command captures microphone input only. The fastest path to capturing system audio without third-party drivers is a built-in aggregate device in Audio MIDI Setup paired with a Multi-Output Device — but that is fiddly, and most people install BlackHole to skip the multi-device dance. Apps that use ScreenCaptureKit can capture app streams without any extra drivers, but the app itself is the install.
Is BlackHole safe to install on macOS?
BlackHole is open-source, hosted on GitHub under ExistentialAudio, and widely used in audio production. It installs as a kernel extension driver on older macOS versions and as a user-space audio driver on newer ones. There is no telemetry in the driver itself. Like any audio driver, it requires a reboot or audio subsystem restart to take effect, and like any third-party driver it can conflict with future macOS updates. If you need a no-install path, ScreenCaptureKit-based apps are the modern alternative.
What's the simplest way to capture system audio on a Mac in 2026?
If you only need your own voice and a transcript, MetaWhisp with the local model — no setup beyond granting Microphone permission. If you also need the other side of a meeting as a separate audio track, MetaWhisp with Call Capture toggled on. If you need raw system audio for editing or playback, BlackHole plus QuickTime (set the output to BlackHole, set QuickTime to record from BlackHole, and capture the loopback).
Will macOS updates break my loopback or aggregate device setup?
Sometimes. Apple has tightened audio routing in several recent releases, and third-party drivers like BlackHole occasionally need updates after a major macOS bump. If your loopback setup suddenly records silence after an update, the first thing to check is whether the driver is still loaded (Audio MIDI Setup → Audio Devices) and whether the driver itself has a compatibility update. ScreenCaptureKit-based apps tend to be more resilient because the API is Apple's.
Can I separate speakers after recording a mixed track?
Not really. Once voices are mixed into one waveform, separating them again requires source separation models (Demucs, etc.) and even those produce rough results — they are not diarization. If you want clean attribution, capture per-track from the start. MetaWhisp's per-track approach keeps your mic and the system audio as distinct files, so each track transcribes cleanly. Speaker labels within the system audio track itself are a separate problem; MetaWhisp does not currently do voice-print speaker labeling.
Does MetaWhisp upload my recordings to a server?
Local mode does not. The default transcription path runs the local Whisper model on-device. No telemetry, no analytics, no upload. If you enable cloud transcription (Pro) or connect your own OpenAI or Cerebras API key for AI post-processing, only the text you choose to send is transmitted — never the audio in local mode, and even with cloud features on, MetaWhisp tells you clearly what is leaving the device. Recording call audio is OFF by default; you have to opt in.
Can I use MetaWhisp to transcribe the system audio side of a Zoom call?
Yes — once Call Capture is toggled on. The system audio track is saved alongside your local transcript. You can transcribe it locally with the same Whisper model that handles your mic, or skip it if you only needed your own side. For a Zoom-specific walkthrough, see the Zoom transcription guide. The first-party accuracy number we have is WER 2.76% on LibriSpeech test-clean; meeting audio accuracy has not been benchmarked separately, so I won't pretend to a figure there.
Written by Andrew Dyuzhov — solo founder of MetaWhisp, marketer-turned-builder with ADHD who assembled MetaWhisp using AI coding tools on top of open-source Whisper. I dictate in Russian and English daily and built the app because nothing on the market did what I needed. I run an M-series Air and tested every method above on it. If you spot something wrong or out of date, find me on X.
